How to use the quickstart package as a manual?
If you purchase any Joomla template in our store, you will be able to download a quickstart package. It is a copy of the live demo, which you can see for each template in our offer. This package includes Joomla, template and extensions. Everything is already set up, so as to present the basic functionalities.
New website
If you create a website from scratch based on our template, you can save a lot of time by installing the quickstart package. The installation process of this package looks exactly like Joomla installation, check the video tutorial for for Joomla 3.x and Joomla 2.5. After installing the quickstart package, you only need to replace the text and images with your own and the website is almost done.
Existing website
There may also be a such situation that you already have an existing website and you need to install the template and extensions separately instead of installing the quickstart package. At this point, you need to understand the difference between the template and quickstart. You should take into account that you will have to configure a lot of settings to achieve a similar effect as on the live demo. This way you will spend more time working with your website, however, it does not have to be like that. In this article I will describe how to use the quickstart package as a manual when setting up your site:
1. Install the quickstart package on subdomain or localhost.
First of all, you need to install the demo copy on subdomain or on localhost to be able to preview all necessary settings. How to install the quickstart package you will find out from this article.
2. Configure the template parameters.
Now, you can pass on to the template parameters. Log in to your Joomla backend and go to Extensions -> Template Manager -> [template_name]. In the template parameters you can set many useful options, for example:
- change the logo image
- choose the default color version
- set the template and columns width
- set the font family and font size
- enable the Google Analytics or Google Webmaster Tools
- and much more!
Examples:
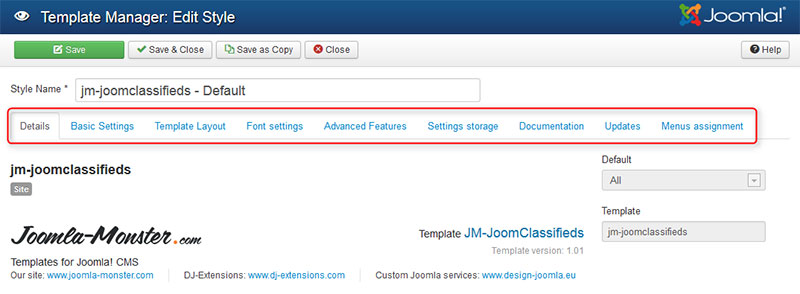
Joomla 3.x template based on EF3 framework, parameters:
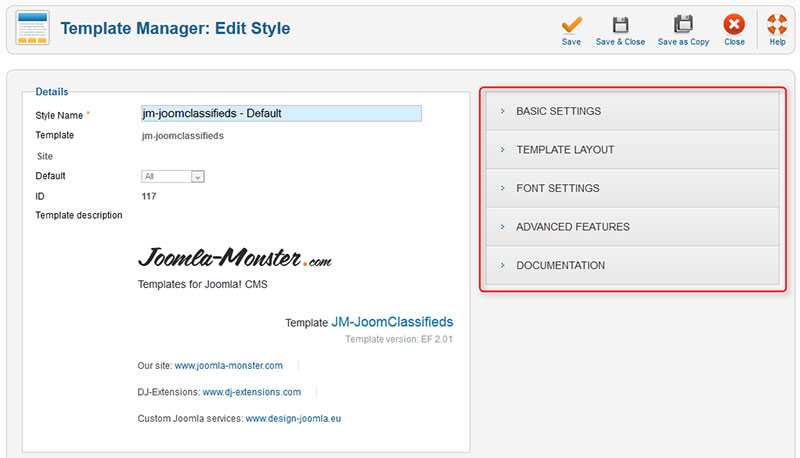
Joomla 2.5 template based on EF1/EF2 framework, parameters:
For more details regarding the template parameters, please check the following articles:
- General Info - framework for Joomla 3.x templates
- General Info - framework for Joomla 2.5 templates
If you would like to have the same template parameters as on our live demo, you can preview them from the previously installed demo copy on your subdomain or localhost.
3. Configure the modules.
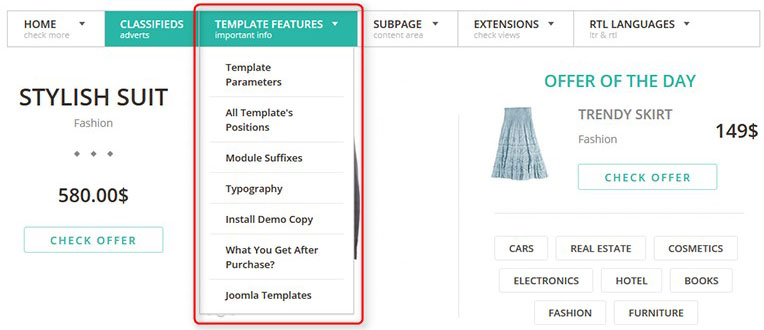
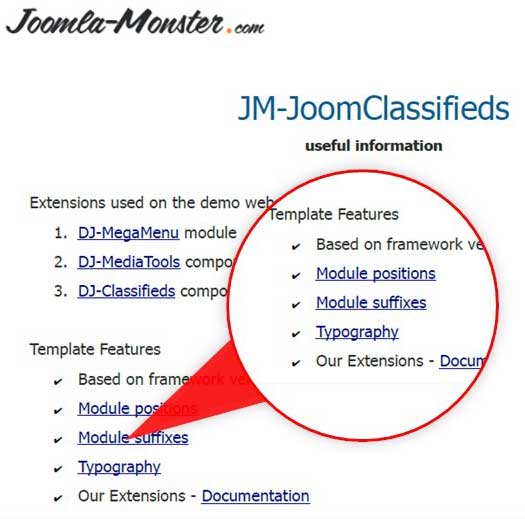
Next, you can pass on to the modules' configuration. In Extensions -> Module Manager you will see a list of available modules. On the live demo, you can find some useful information related to module positions, module suffixes and typography. The article links are usually located in the main menu under the Template Features menu item, as well as in the manual which you can find in your download area.
Template Features on live demo:
Template Features in the manual:
Module positions – using this article you can simply find the module position on which you would like to configure a module on your website.
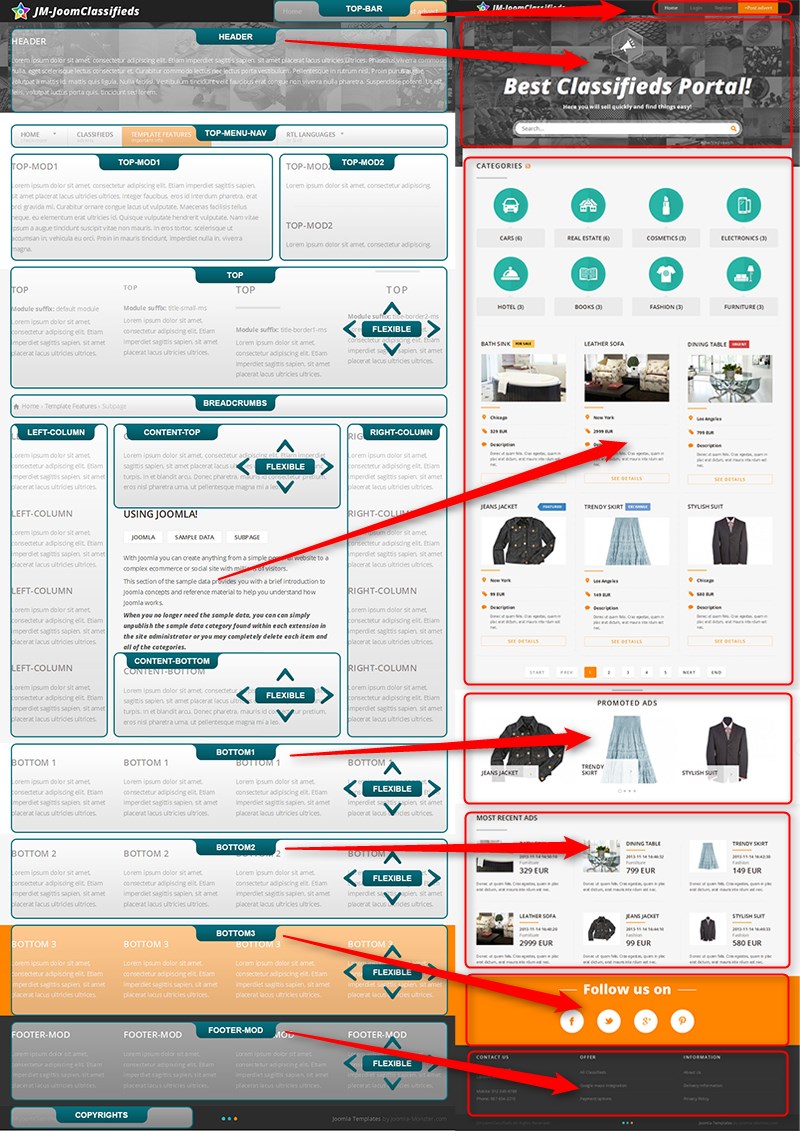
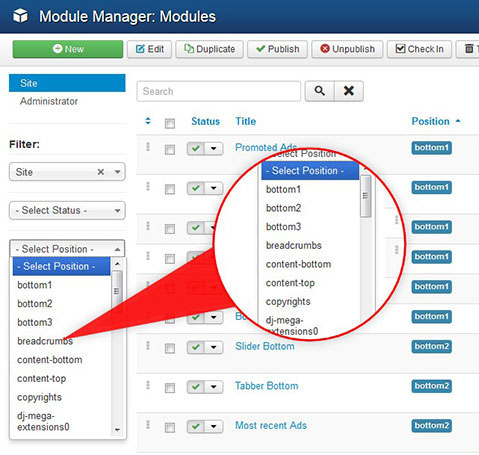
In the Extensions -> Module Manager you can use the filtering option to list all modules from a selected position:
TIP: Front-end site management in Joomla 3.x
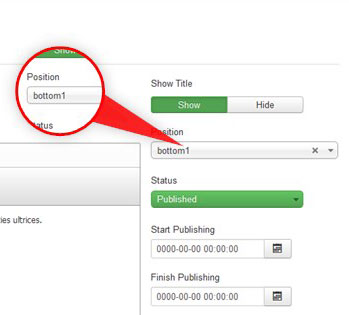
Please note that you may need to change the module positions for some modules on your current website, since the module positions may vary depending on the template. The module position you can change in the module parameters:
Module suffixes – in this article you will find all module suffixes available in the template.
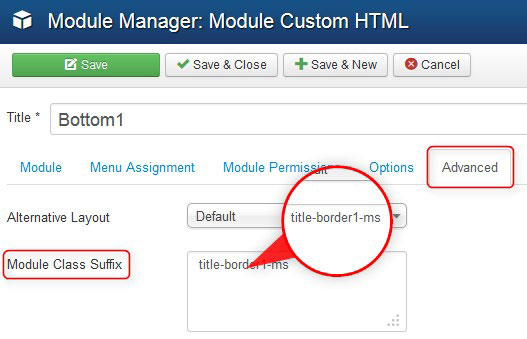
Module class suffix is a parameter that allows to add a new class for the specific module to distinguish it from other modules. In other words, by using the module class suffix you can achieve an additional module design.
Take a look on examples of module suffixes in a template:

The module suffix you can add in the module parameters on the Advanced tab:
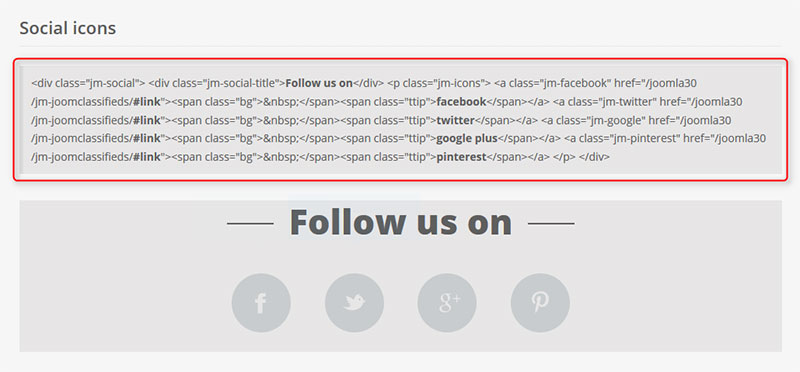
Typography – in this article you will find the typography and examples of the use of custom HTML code in the template.
Simply copy the code you need from article:
And paste the code as the module content:
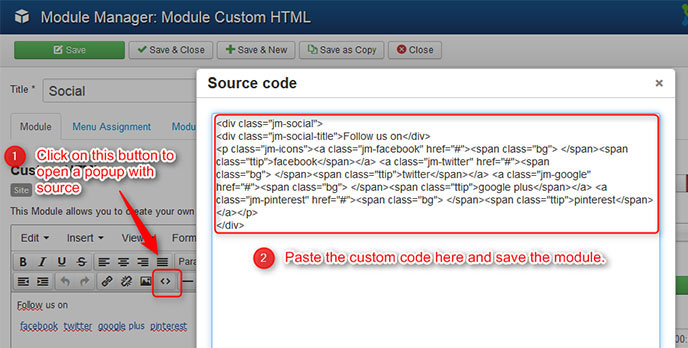
TIP: How to create a custom HTML module?
If you would like to have the same module parameters as on our live demo, you can preview them from the previously installed demo copy on your subdomain or localhost.
4. Configure the extensions.
The last step is to configure all extensions available on the live demo. First of all, you should check which extensions are used for your template. You can check them in the template description:
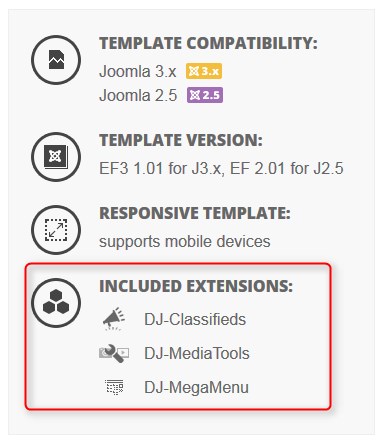
Let's take the DJ-MediaTools extension as example. The configuration should be carried out as follows:
- Visit the DJ-Extensions.com to download the extension package.
- Go to Extensions -> Extension Manager to install it on your website.
- Go to Components -> DJ-MediaTools:
- create an album for your items
- create items for album
- copy global options from the demo site
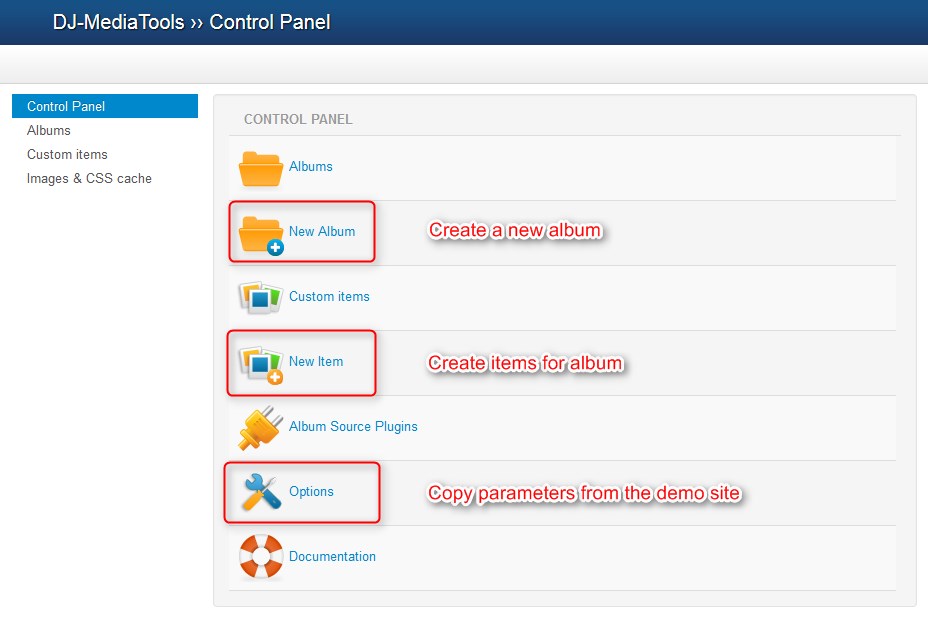
Please note: The global options may be overridden from the module or menu item parameters.
Go to Extensions -> Module Manager and find the DJ-MediaTools Album module. Using this module you can display an ablum on your website.
For more detailed instructions regarding the configuration of all extensions, please visit our extensions site:
http://dj-extensions.com/documentation
You may find also interesting the FAQ section:
We hope that if you get familiar with the above points, the template configuration will become for you a lot easier.