How to display intro and full article images in Joomla?
Would you like to insert and display separate images for intro text and full article in your Joomla blog? Start using standardized images to save your time!
How to enable intro images in Joomla article?
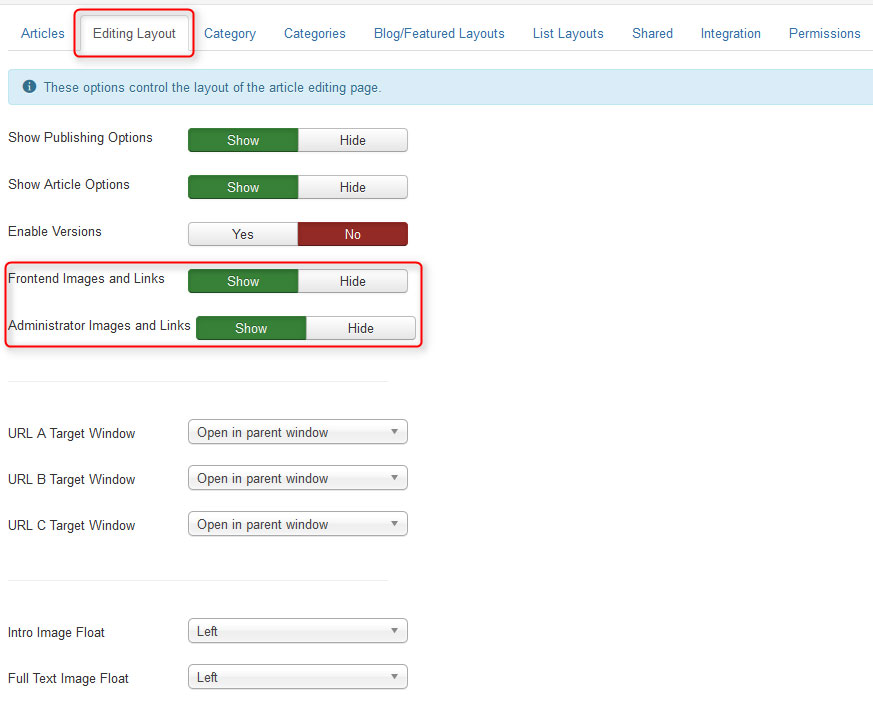
In your Joomla back-end navigate Content -> Articles and click on the Options button (at top right). Then open Editing Layout tab to check if:
- Administrator Images and Links paremater is set to Yes
- if you need to enable this option for front end editing set Yes to Frontend Images and Links

You can also specify placement for images, take a look at Intro Image Float and Full Text Image Float settings.
Important CSS styles
The intro image will use the following classes: img-intro-none, img-intro-right, img-intro-left, so make sure that your template includes the relevant css style, otherwise siply add the following styles to your template.
.img-intro-none {
   text-align: center;
   margin-bottom: 10px;
}
.img-intro-left {
   float: left;
   margin-right: 10px;
}
.img-intro-right {
   float: right;
   margin-left: 10px;
}
The similar code should be placed for Full Text Image Float if needed.
.img-fulltext-none {
   text-align: center;
   margin-bottom: 10px;
}
.img-fulltext-left {
   float: left;
   margin-right: 10px;
}
.img-fulltext-right {
   float: right;
   margin-left: 10px;
}
In addition, you can add for example any border, shadow or background for the image container.
Inserting the image into Joomla article
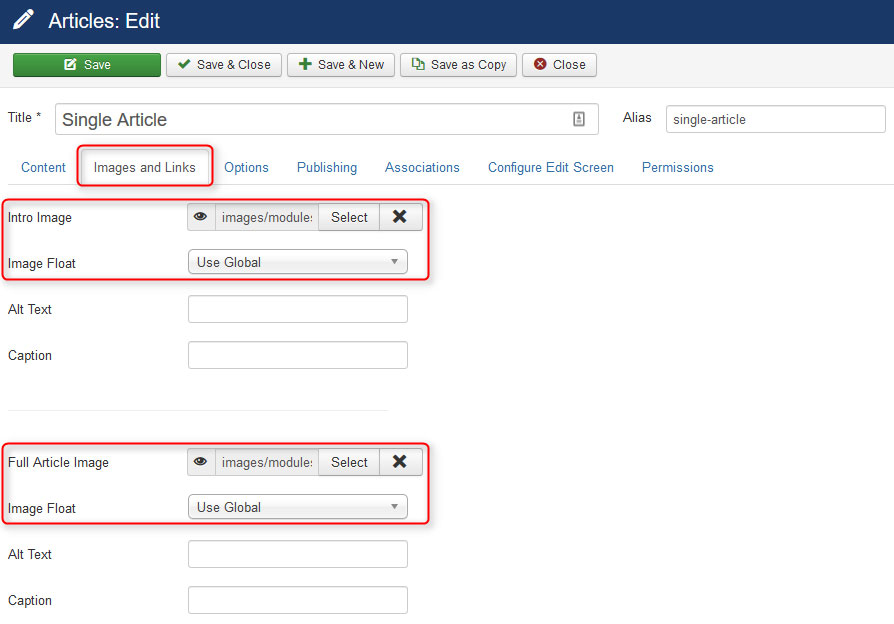
Once the necessary configuration is done save settings and edit any article to check how it works.
Open Images and Links tab, should see as follows:

Select the image, do not forget about Alt text - it's important to your site's search engine optimization since an effective image alt tag helps robots to understand the image you inserted on yur site.
The Result
