How to configure a multi column submenu in DJ-MegaMenu?
DJ-MegaMenu is a Joomla menu module which gives you wide range of settings to display a drop-down horizontal menu in the way you need.
Displaying menu items in multiple columns
If a parent menu item contains several child items, you may want to display them in multiple columns.
Go to "Menus -> Main Menu". This is how your menu structure may look like:
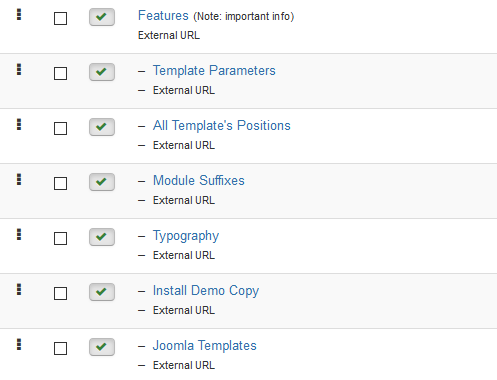
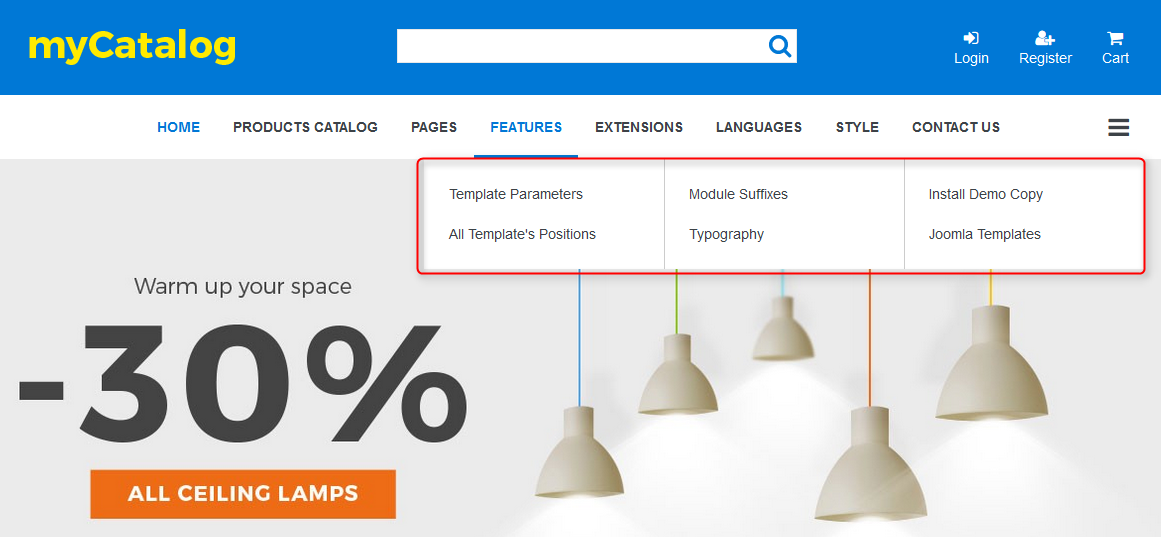
In our example, the "Features" Joomla menu item (parent) has 6 submenu items (child items). On the front-end they are displayed as a standard drop-down menu:
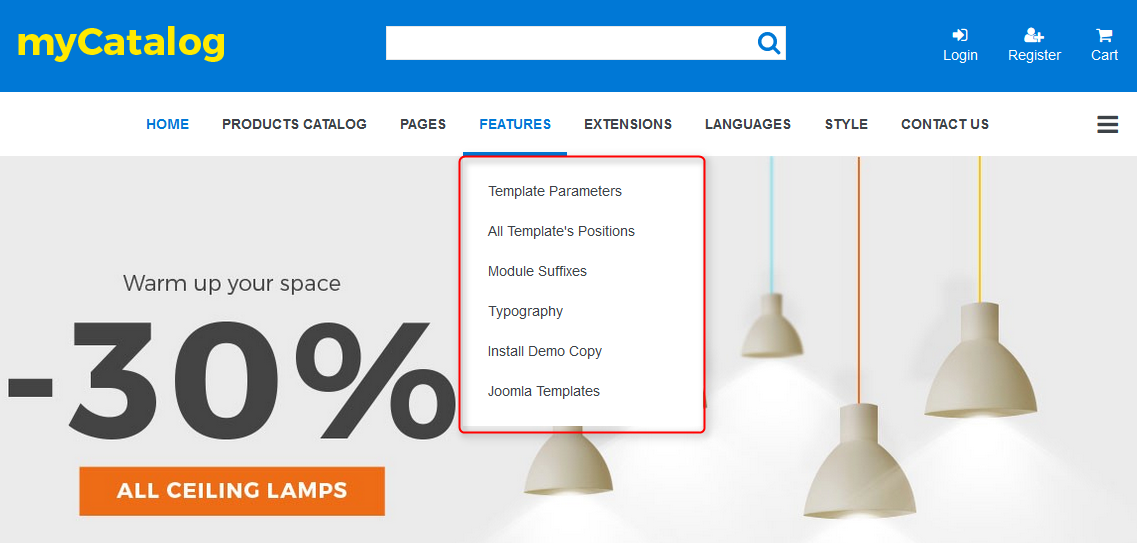
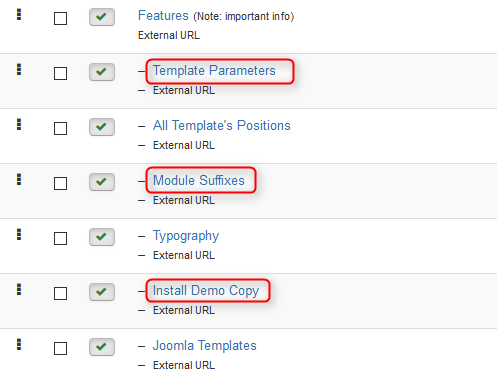
Let's assume that you want to display them in 3 columns, 2 submenu items in each column. To do that, you need to edit 3 of them: the first one, the third one and fifth one.
Each of them will start a new column. When editing, go to the "DJ-MegaMenu Options" tab and select "Yes" for the "Start new column" option:
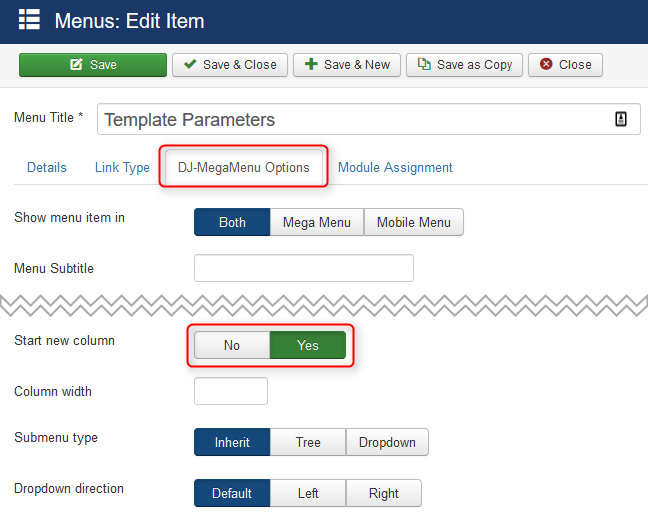
In addition, you can specify the column width, otherwise, it will be taken from the default column width option in the DJ-MegaMenu Joomla menu module. Remember to save your settings.
This is how the submenu should look after editing the mentioned submenu items:
Displaying modules in multiple columns
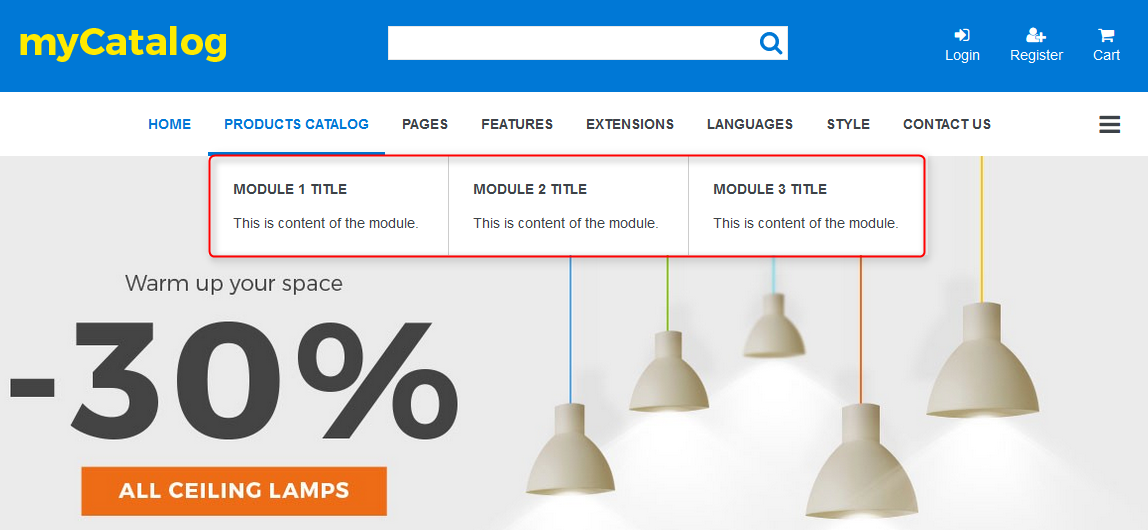
DJ-MegaMenu module allows you to assign module positions to submenu items. This way you can display many modules in multiple columns in the submenu.
Let's assume that you want to display 3 modules in the submenu, each one in a new column, like in this example:
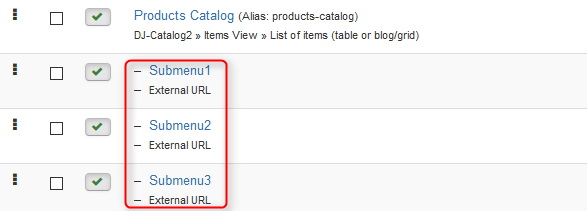
To do that, you need to create 3 submenu items. Go to "Menus -> Main Menu -> Add New Menu Item":
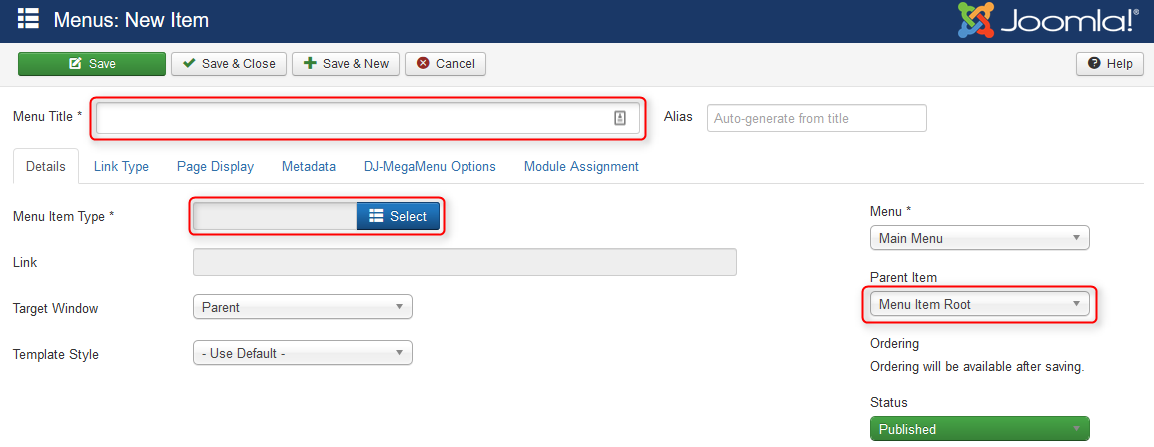
Enter the title, choose the parent menu item and select the menu item type. These menu items will not be visible in the submenu (only the modules from the module positions assigned to them), so you can simply create them as "External URL" or "Text Separator".
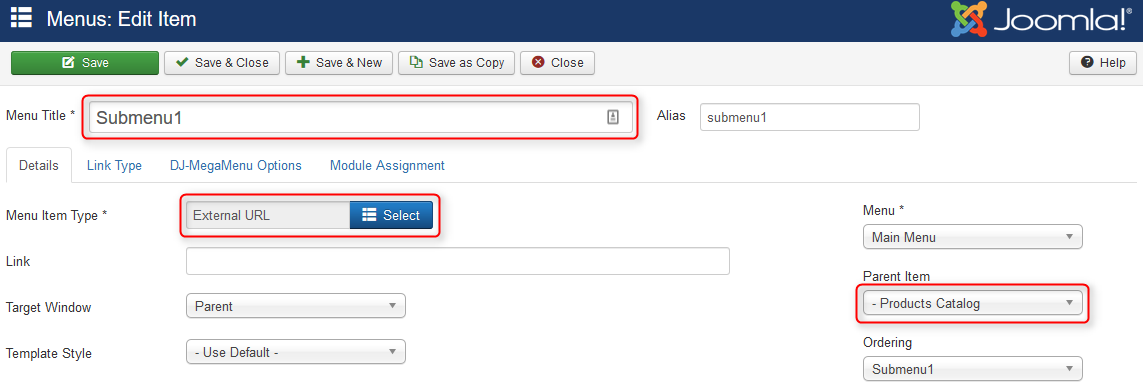
On the "DJ-MegaMenu Options" tab, select "Yes" for the "Start new column" option and enter a "Module position" name:

Remember to add a different module position name for each submenu item.
Save your settings. Repeat the above steps for the next submenu items. After that, we have the following submenu structure in "Menus -> Main Menu":
Now is the time to assign modules to the previously created module positions.
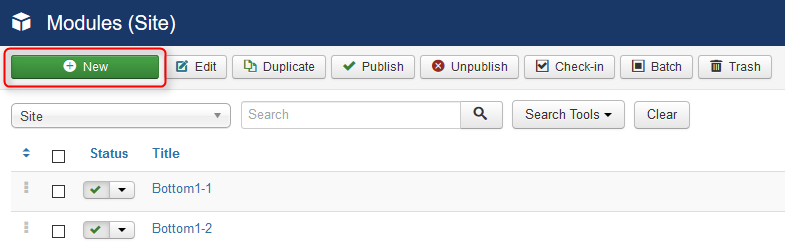
Go to "Extensions -> Modules -> New"
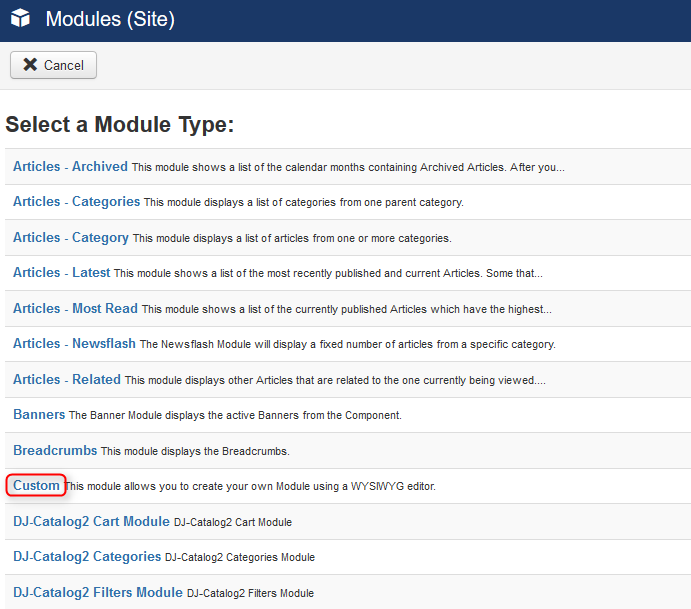
In our example, we create a "Custom" module, but you can choose and display any type of the module:
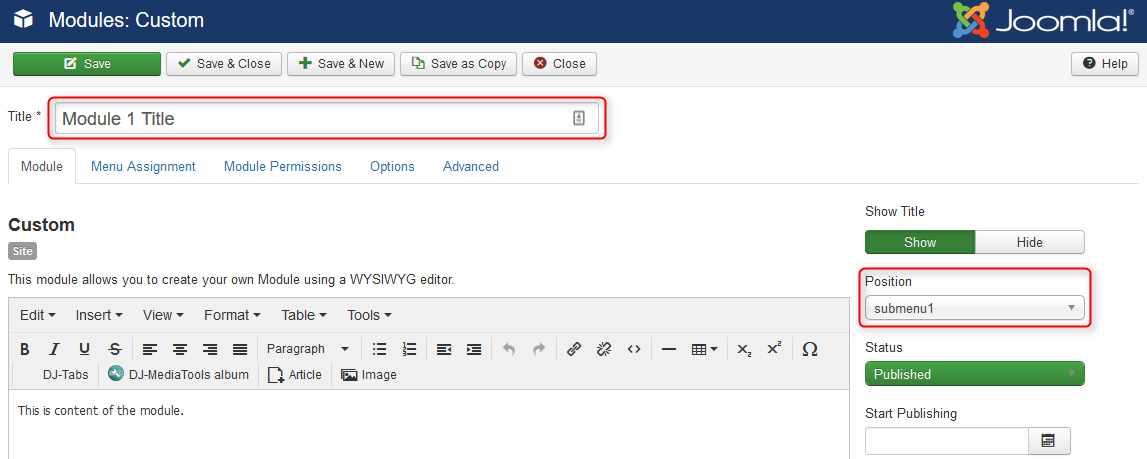
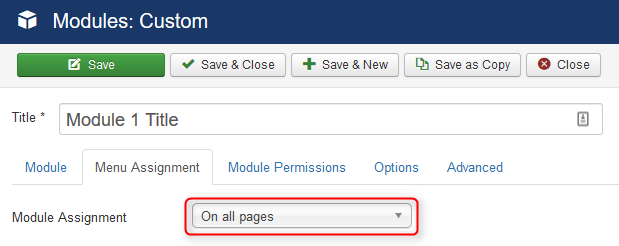
In the module settings you need to enter the module title and position:
Also, make sure that the module is assigned to proper menu items. On the "Menu Assignement" tab, you can choose "On all pages" to be sure it will be visible always.
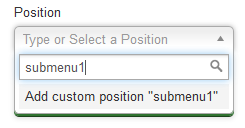
You will probably notice that the module position name is not available on the list. Don't panic, simply type the position name manually and confirm by pressing "Enter" on your keyboard:
Save the module. Repeat the same steps for the next 2 modules you wish to display in the submenu. Remember to choose the module positions that you previously assigned to the submenu items.
That's it. After following the steps, you should get exactly the same effect as in our example: