How to install Joomla?
Joomla 3 installation is easier than for the previous Joomla versions. You may find the installation process much friendly - since it's completely reorganized to make it more simply and intuitive accroding to the idea of the optimized user experience (UX).
What you need to know before getting started?
- Check if your server meets technichal requirements to install Joomla 3.0 as well as extensions for Joomla 3.0
No matter if you want to install Joomla 3.0 on dedicated server, shared hosting plan or local computer - it must meet technical requrements to install Joomla 3.0 successfully. - Collect necessary FTP and database information
FTP details:
a) host name
b) username
c) password
Database details:
a) host name (usually is localhost but it may be also the specific host name)
b) username
c) password
d) database name
All those information you should be available to get at your hosting cpanel.
Ask your hosting provider if you are not sure where to look for them.
Downloading and uploading Joomla 3.0 files.
- Download the latest Joomla 3.0 version.
- Unpack the downloaded Joomla 3.0 package on your computer.
- Login to your server using previously collected FTP details. Use any FTP client, for example Filezilla.
- Transfer all Joomla files on your server.
Installation process.
Enter your website domain name to start the 3-step installation process.
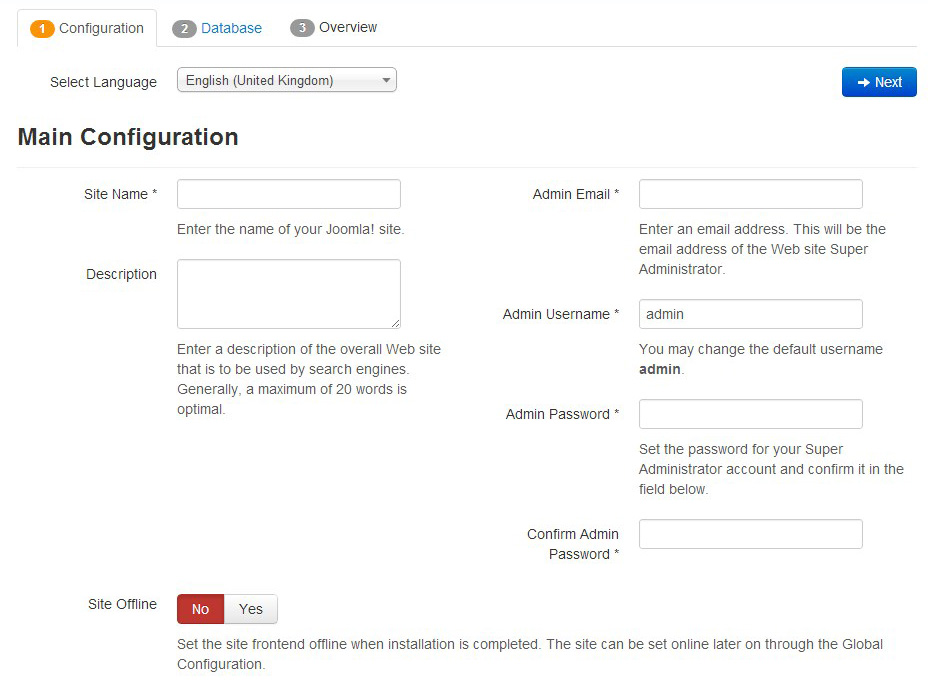
Step 1 - Main Configuration

Fill in the following fields:
Site Name - your site name e.g. Best marketing solutions.
Description - optional, enter a description of the overall Web site that is to be used by search engines. Generally, a maximum of 20 words is optimal.
Admin Email - enter your e-mail address, you can change it after completing the installation but make sure it's correctly entered
Admin Username - enter your own username or stay with the default one
Admin Password - enter a difficult password for security reasons (an suer administrator has a full control of the site), you may use any password generator if you prefer
Site Offline - you can make your site offline at this moment or later after successfull installation at Global Configuration. If you set "Yes" there will be message about offline site displayed at frontend. The frontend will require login to see the content.
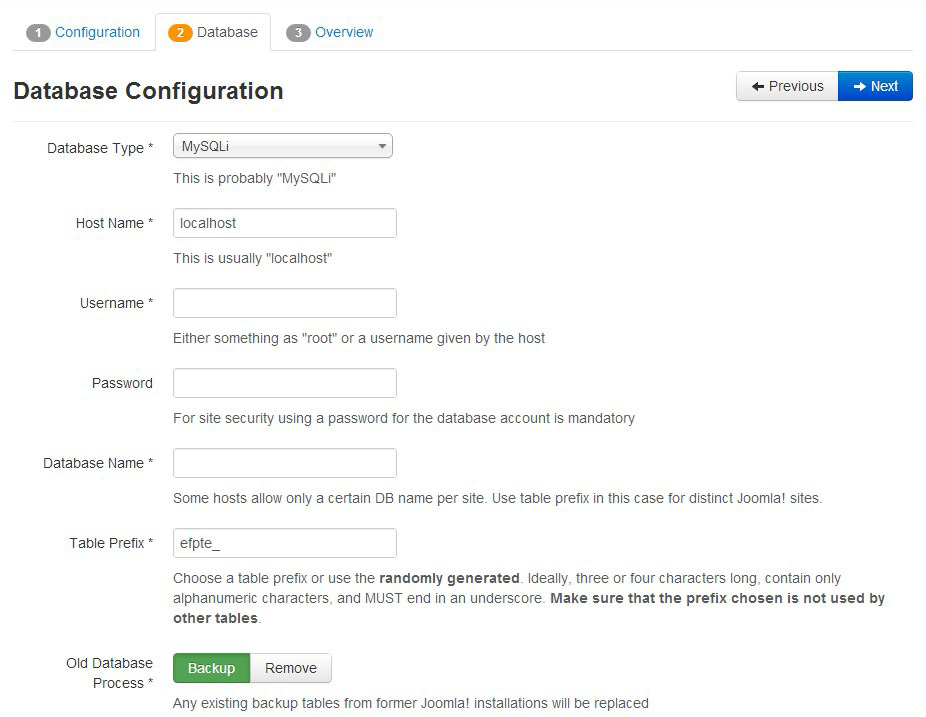
Step 2 - Database Configuration

Now the previously collected database details must be entered.
Database Type - choose the default one, MySQLi
Host Name, Username, Password, Database Name - entered already mentioned database details
Table Prefix - it's randomly generated, do not change it if you do not need
Old Database Process - if you use the same database to install Joomla you may need to keep existing tables, otherwise choose Remove to delete all.
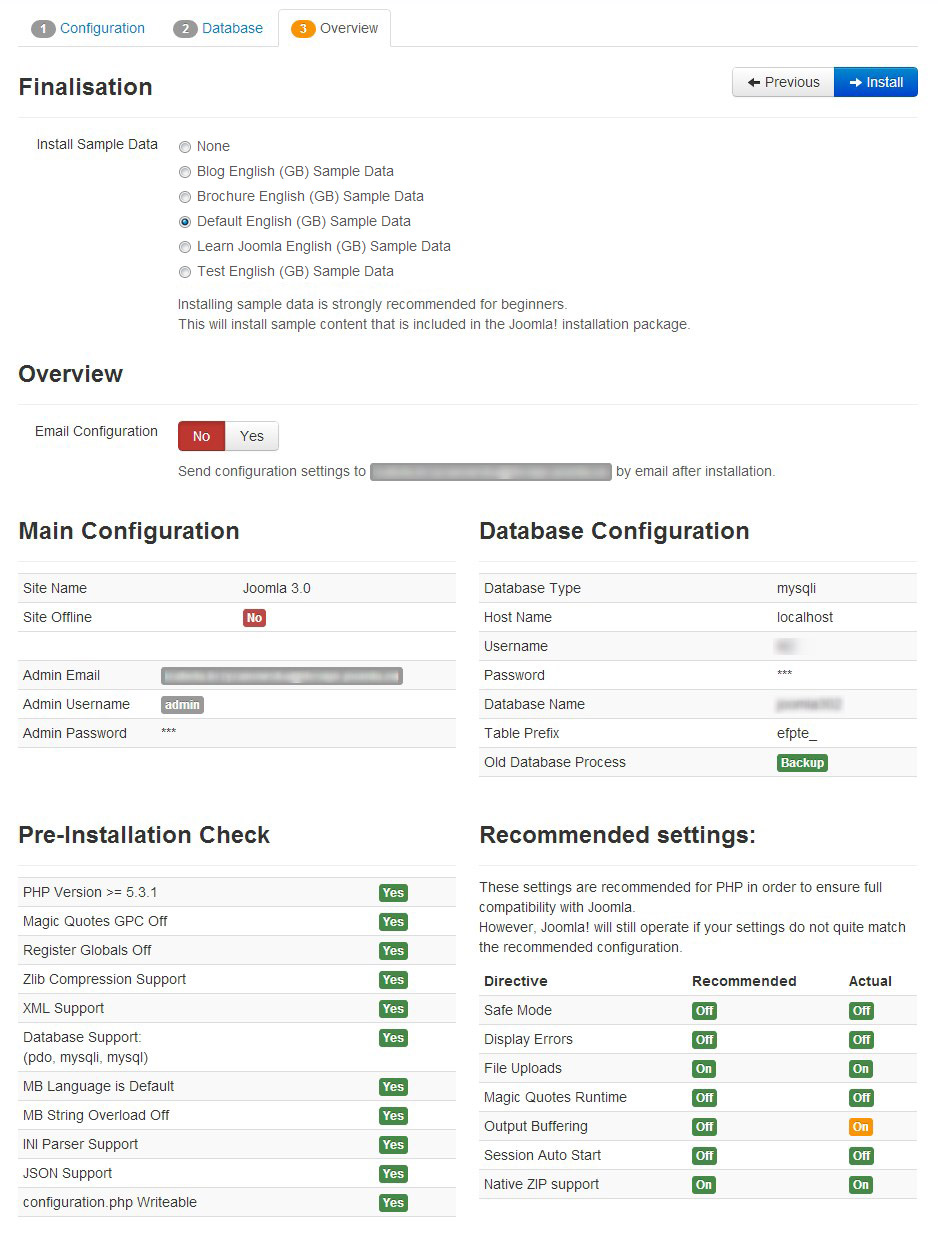
Step 3 - Installing sample data and finalization.

We strongly recommend installing sample data. This way you will get sample content to test how some parts of sample Joomla content is configured. Even if you are not a beginner - the sample content may be helpful for you.
We recommend to select Default Sample Data.
Then you can send your site configuration settings on your mail.
Another 4 sections inform about specific site details, your database configuration from the previous step.
Pre-Installation Check includes info about reqirements that must be marked as "Yes". If any of those requirements are set to "No" you will be able to change them in php.ini (excepting PHP version) - ask your hosting provider if you need the assistance.
Take a look at Recommended settings, they allows to keep compatibility with Joomla. They will not impact on Joomla installation.
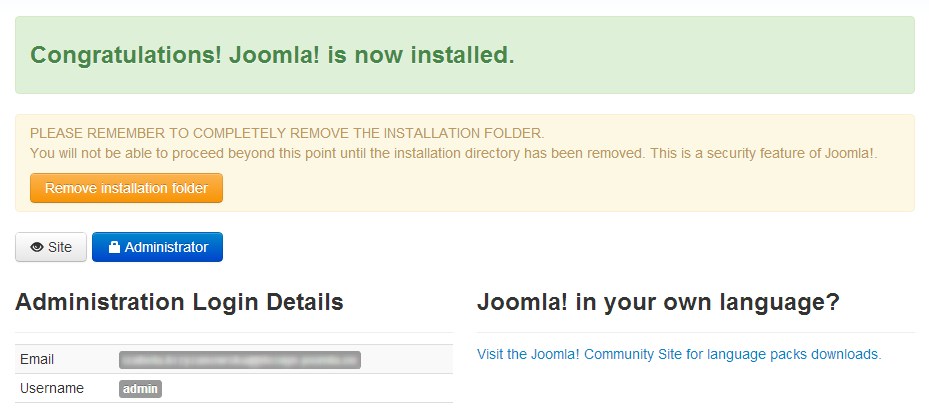
Successfully installed Joomla 3.0

The sample data installtion will take a while then you should see the last installation view.
Remove installation folder and login to your administrator.
Try our FREE Joomla 3 template, install the demo copy of JM Services FREE template as described above!